Sign & Verify
TABLE OF CONTENTS
- Signing messages
- 1. Entering a message and an address
- 2. Confirming the signature on your Trezor
- Verifying messages
- 1. Entering a message and an address
- 2. Validating on Trezor
Signing messages
Signing messages can be used to prove ownership of a specific address.
A typical situation where this might be handy is the following: you have your bitcoin exchange account protected with 2FA, but you lose access to your 2FA tool (mobile phone, email). To get your account unlocked, you can be asked by the exchange operator to sign a message with the bitcoin address associated with your exchange account.
To sign a message, select the account you wish to sign with in Trezor Suite and click the three dots and select Sign & Verify:

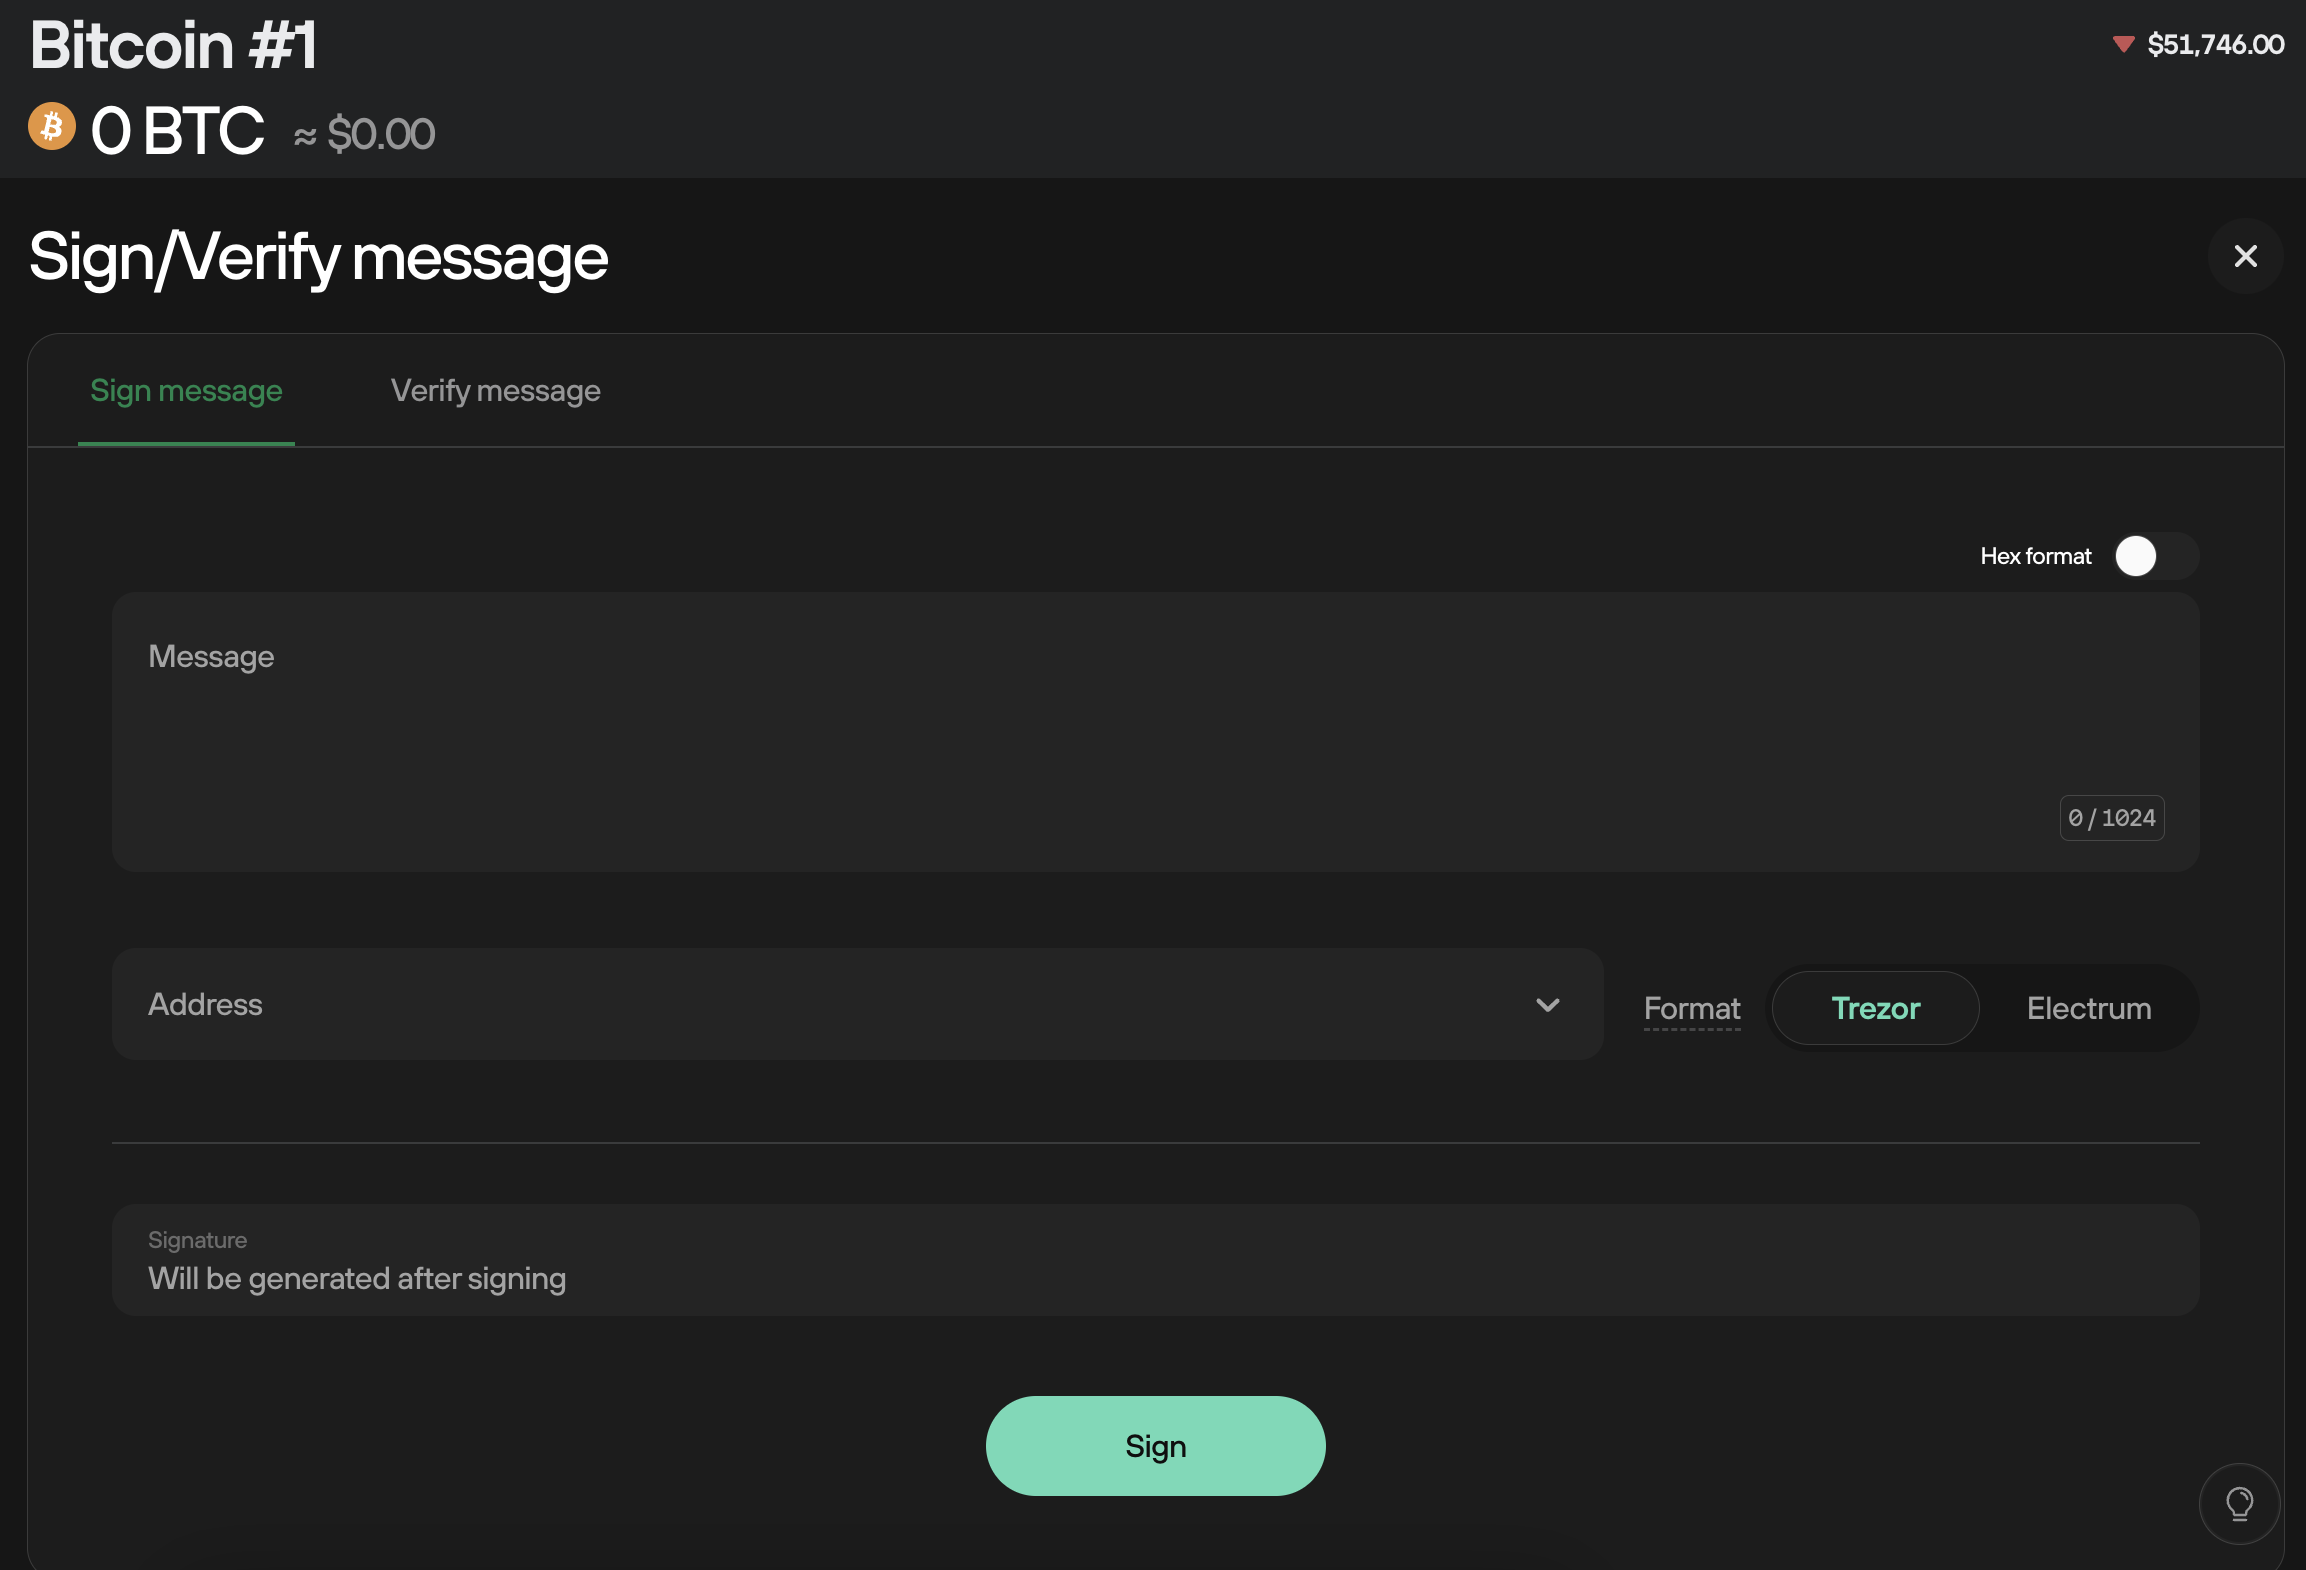
1. Entering a message and an address
Type the message text into the Message box. Copy and paste the correct bitcoin address into the Address box and confirm by clicking on Sign.
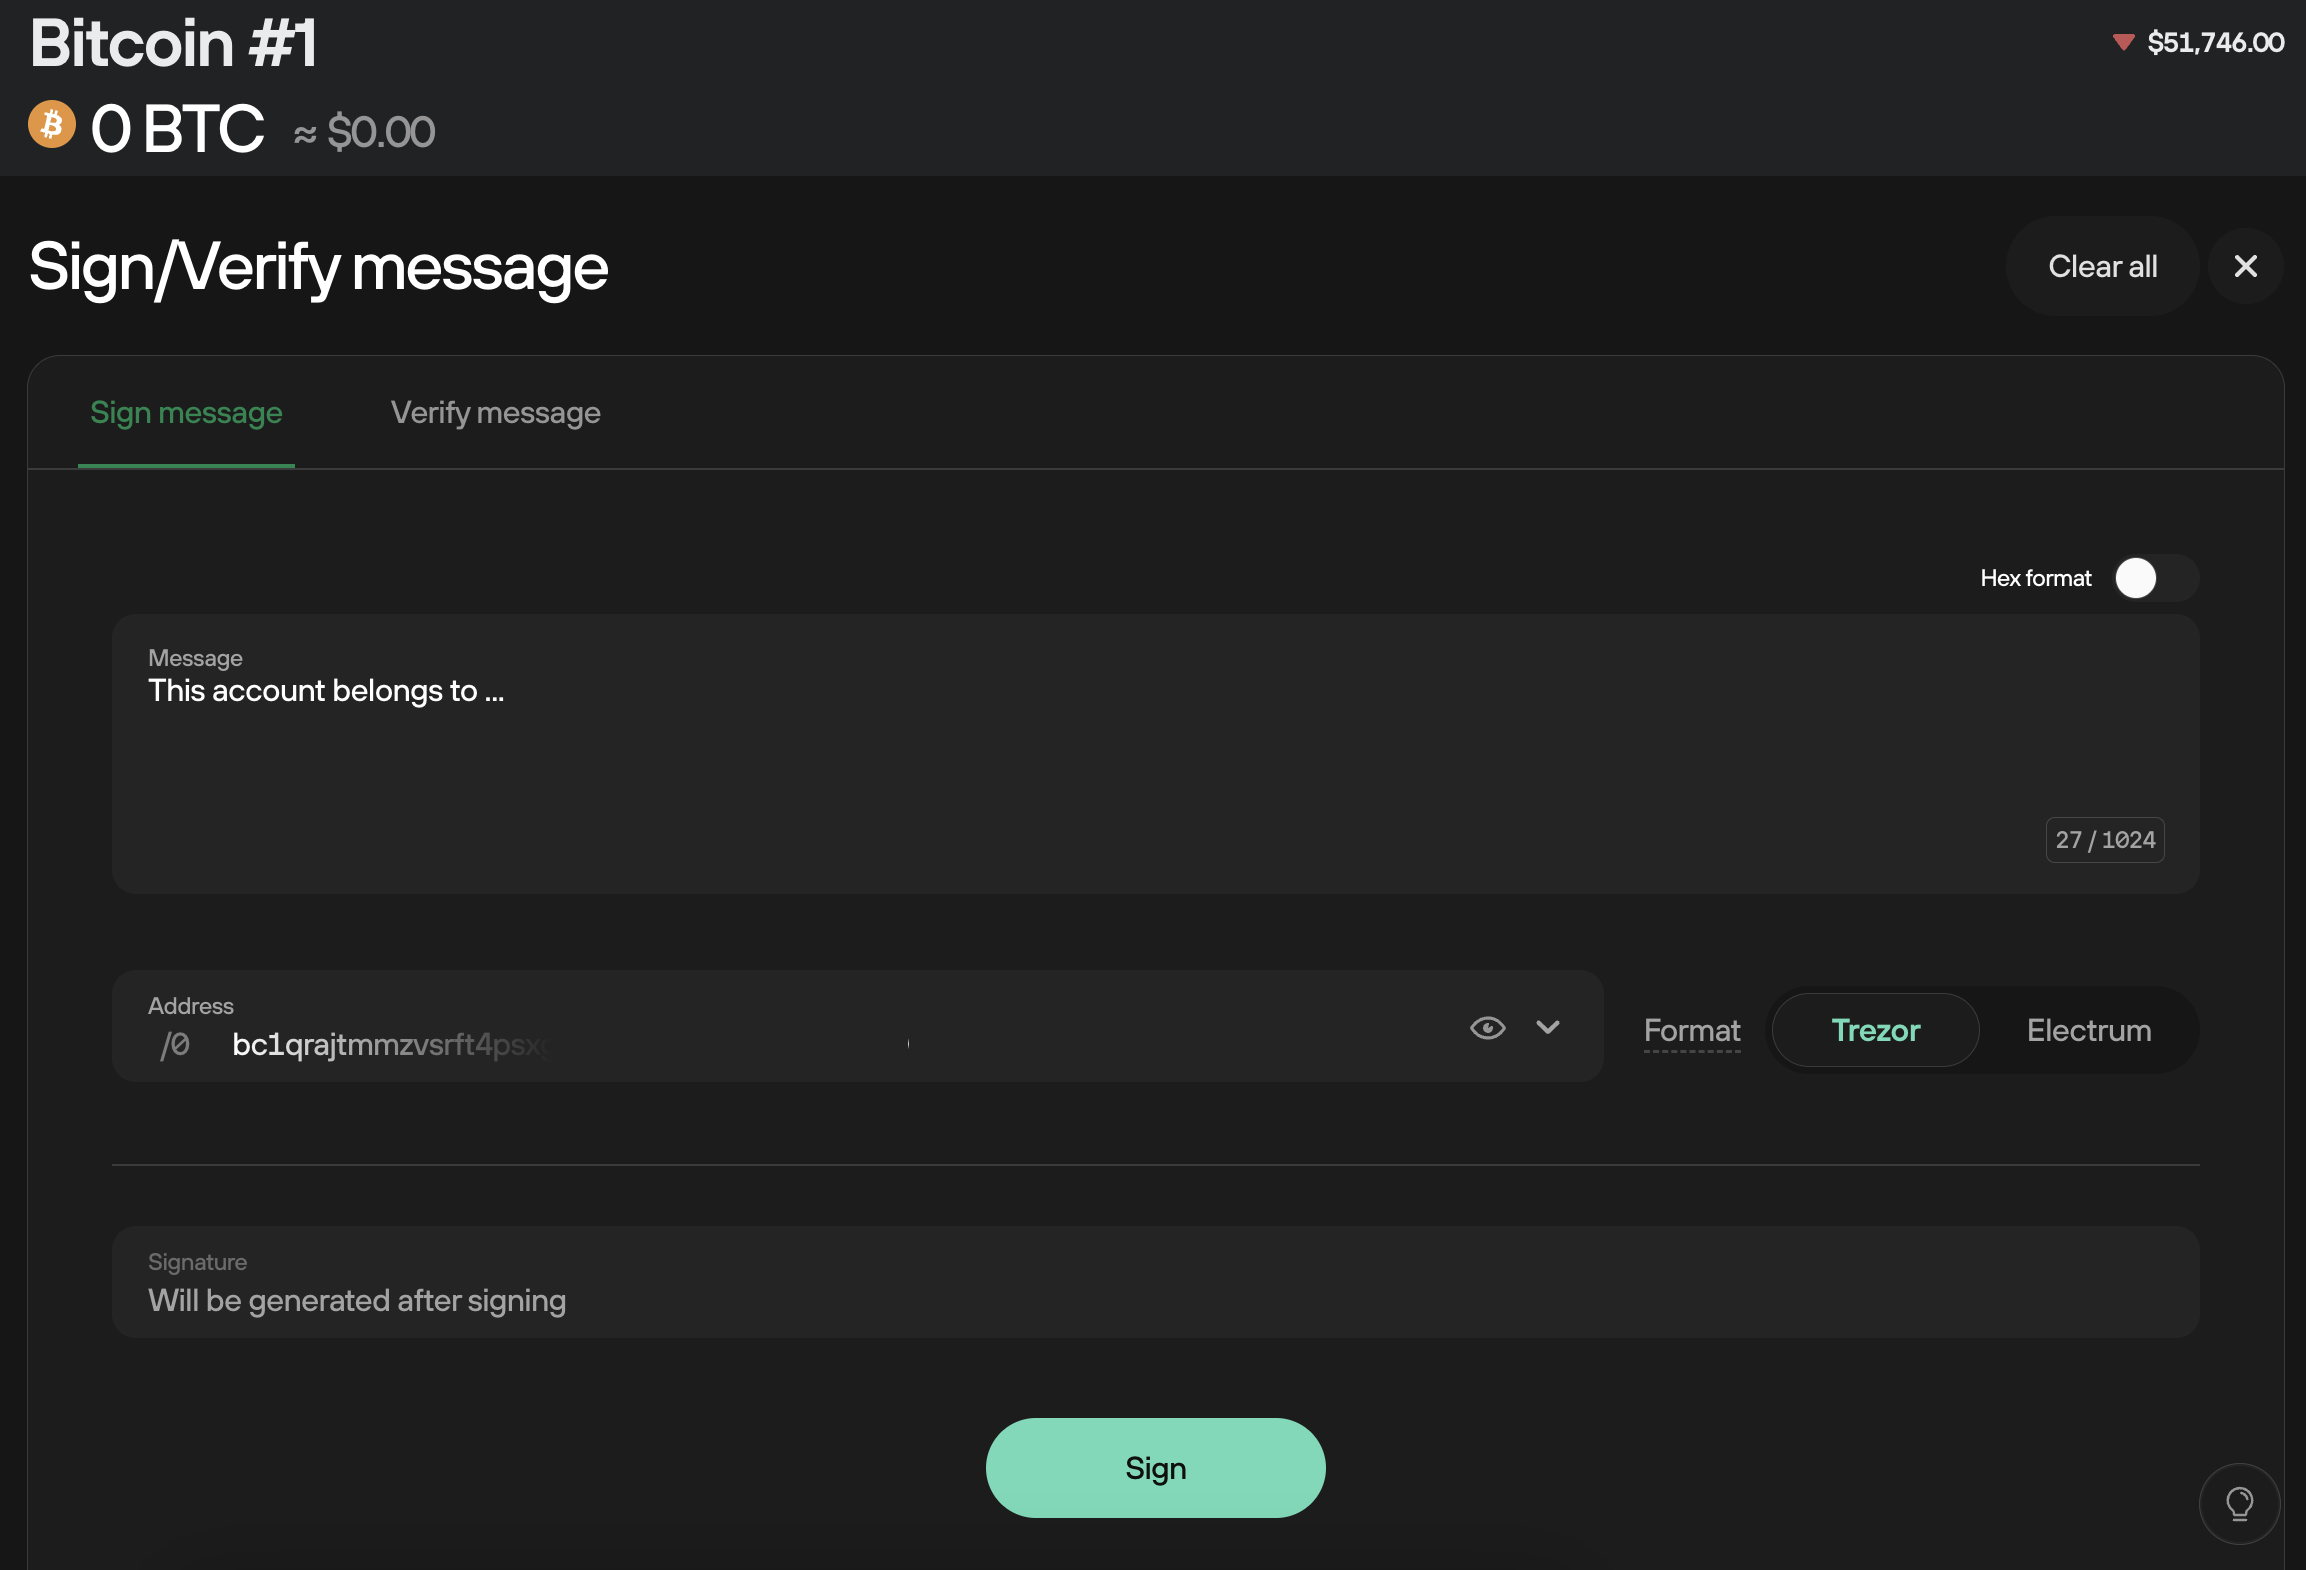
2. Confirming the signature on your Trezor
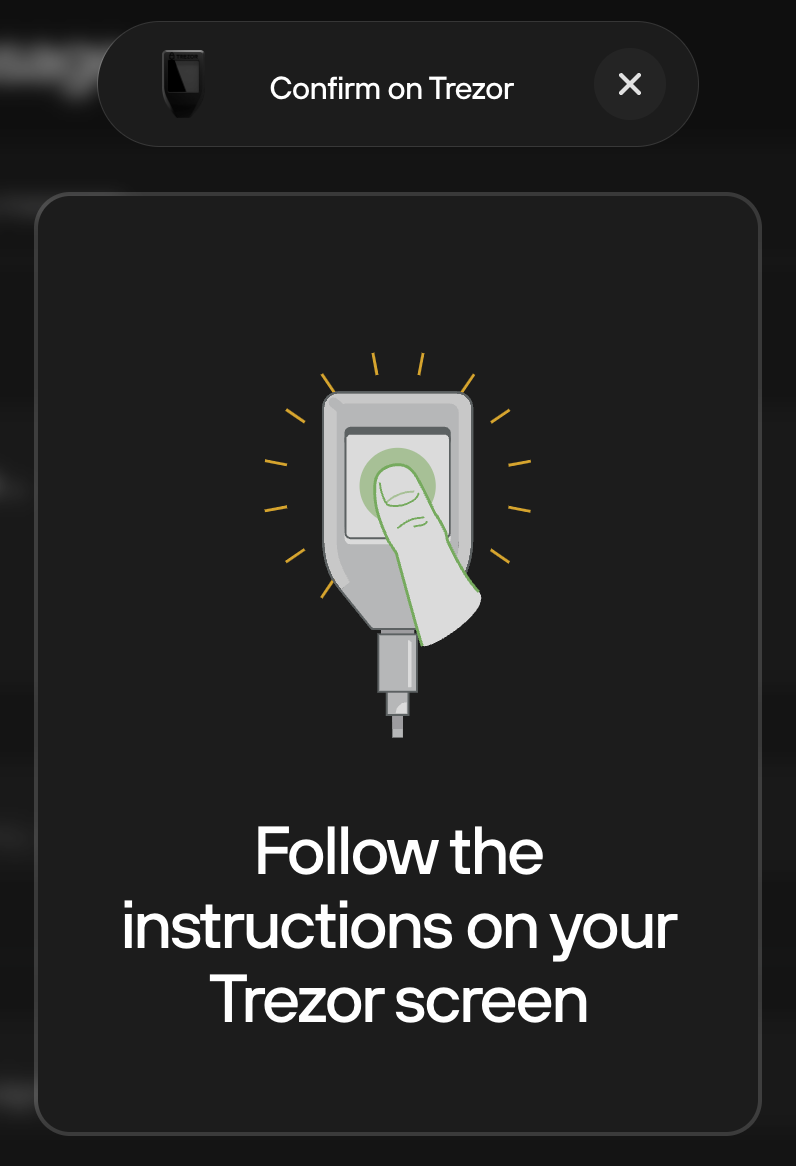
Check the text of the message on the display of your Trezor. If the text is correct, click on Confirm.
Once confirmed on your Trezor, the signature will appear on the screen.
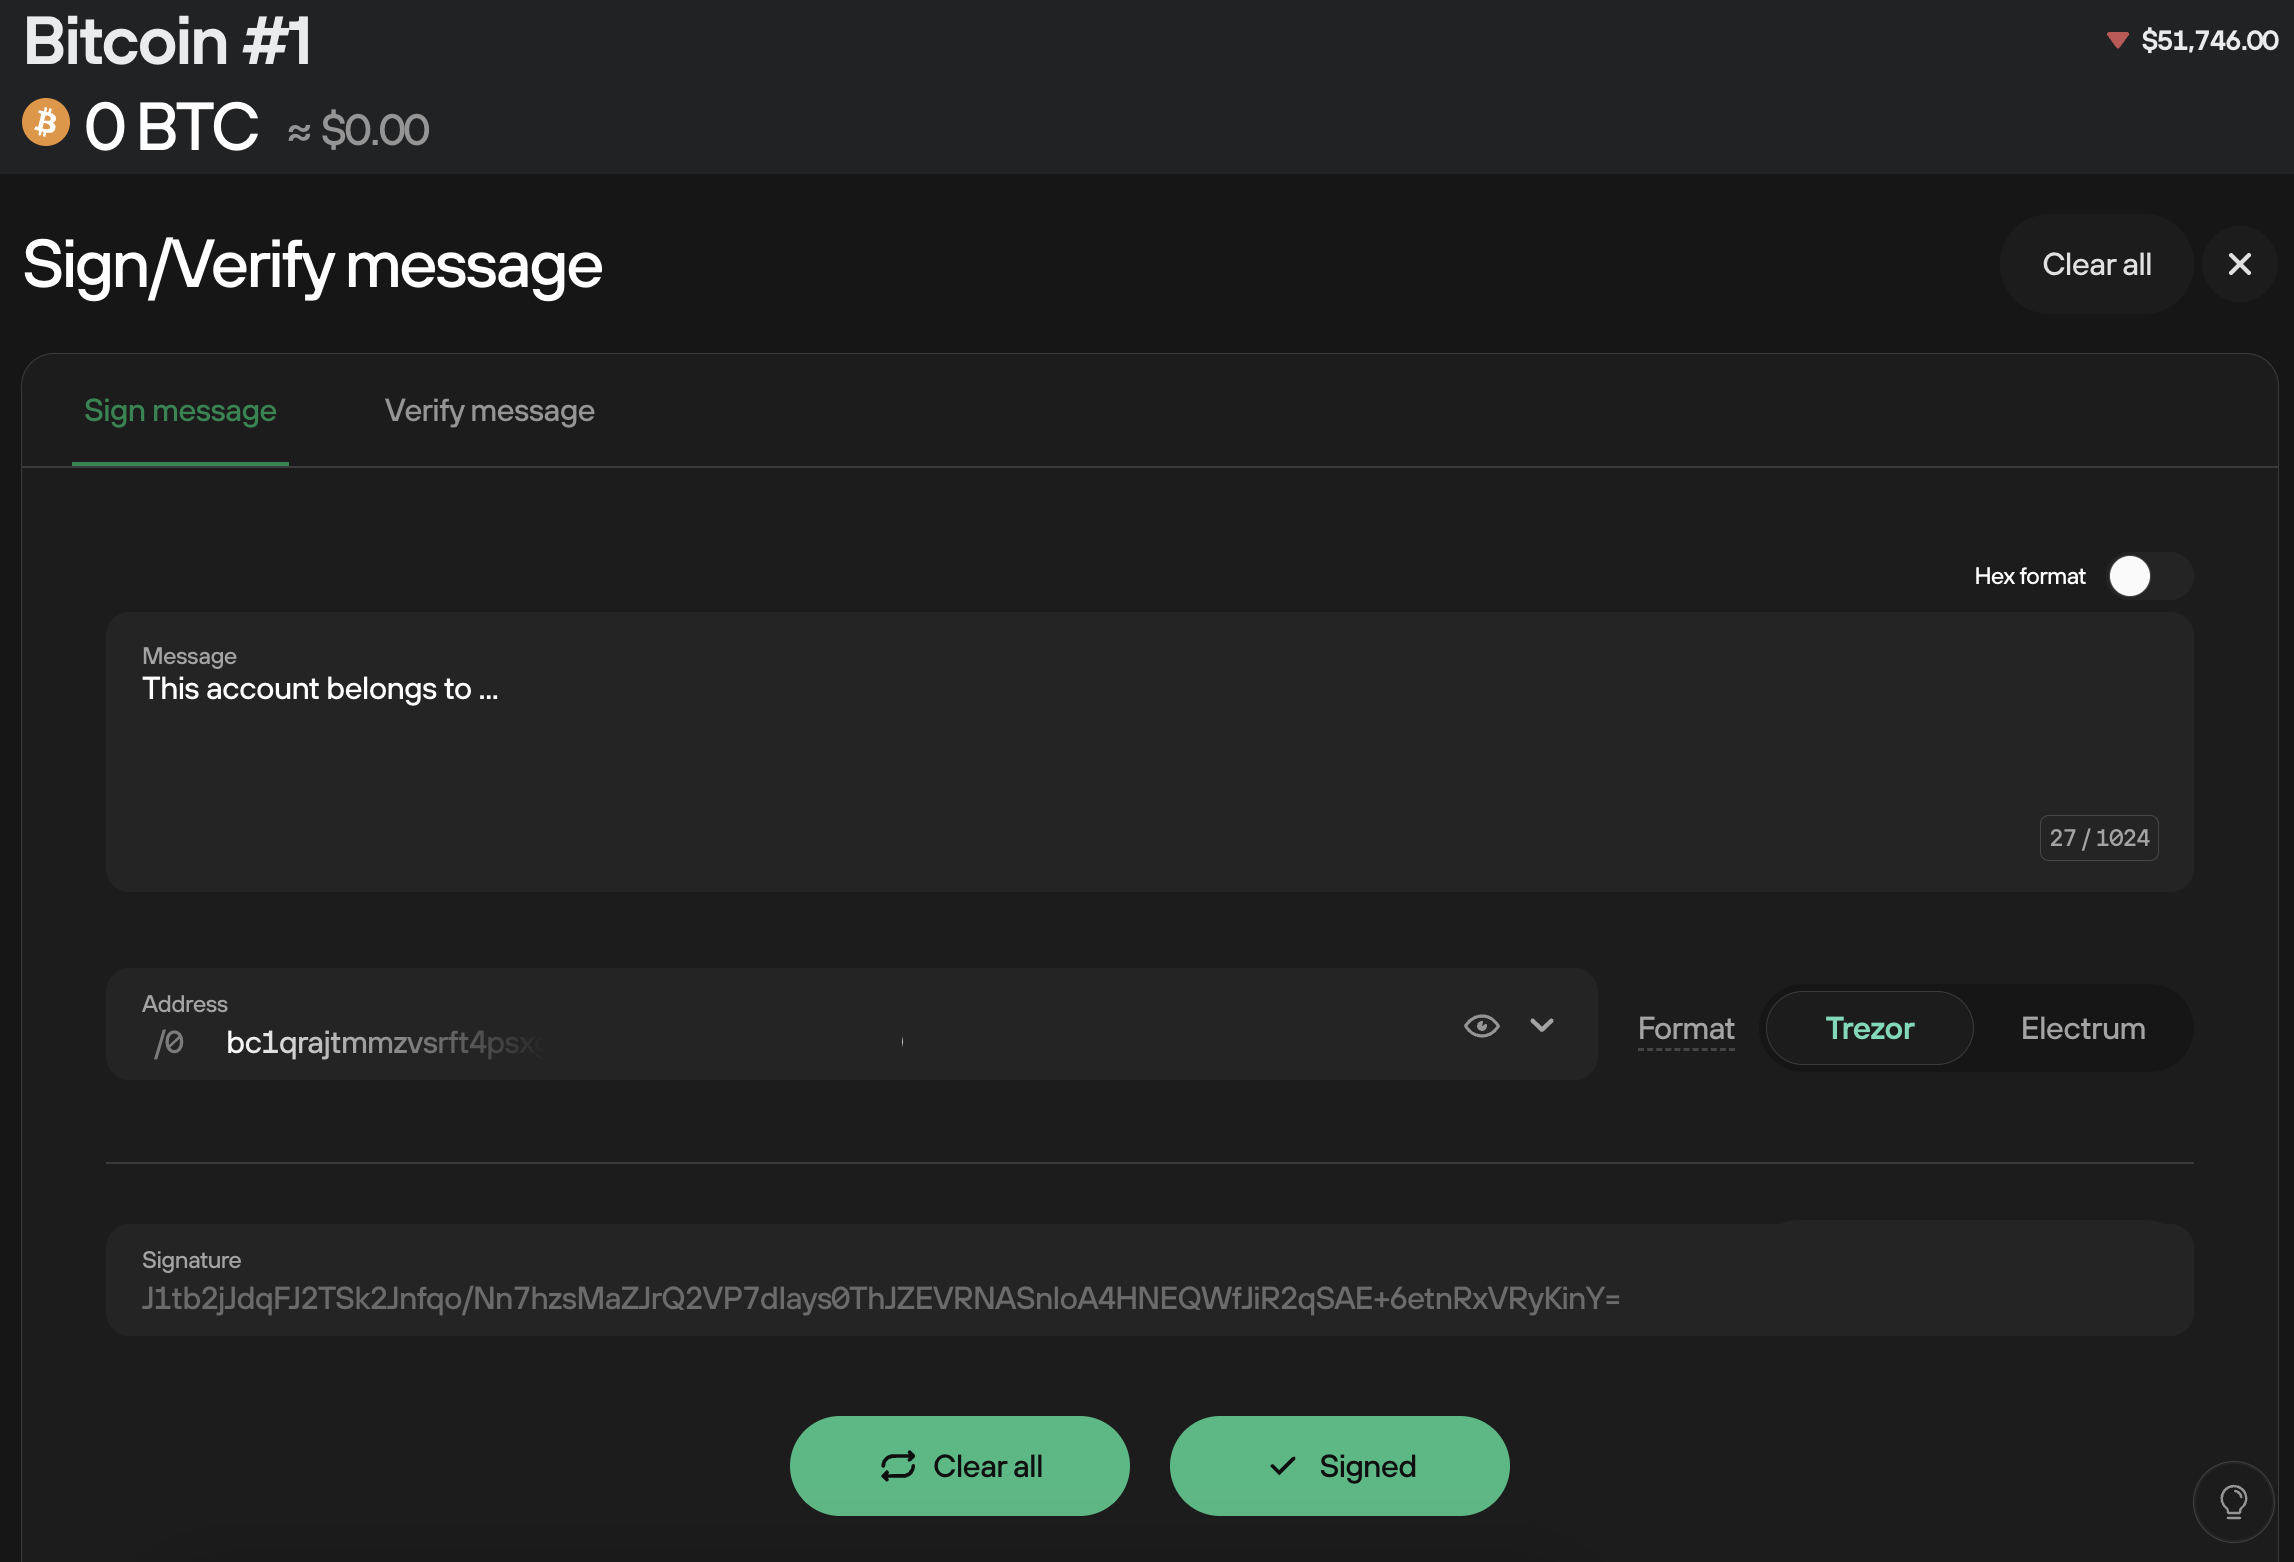
You can click on Copy & Close to copy the signature.

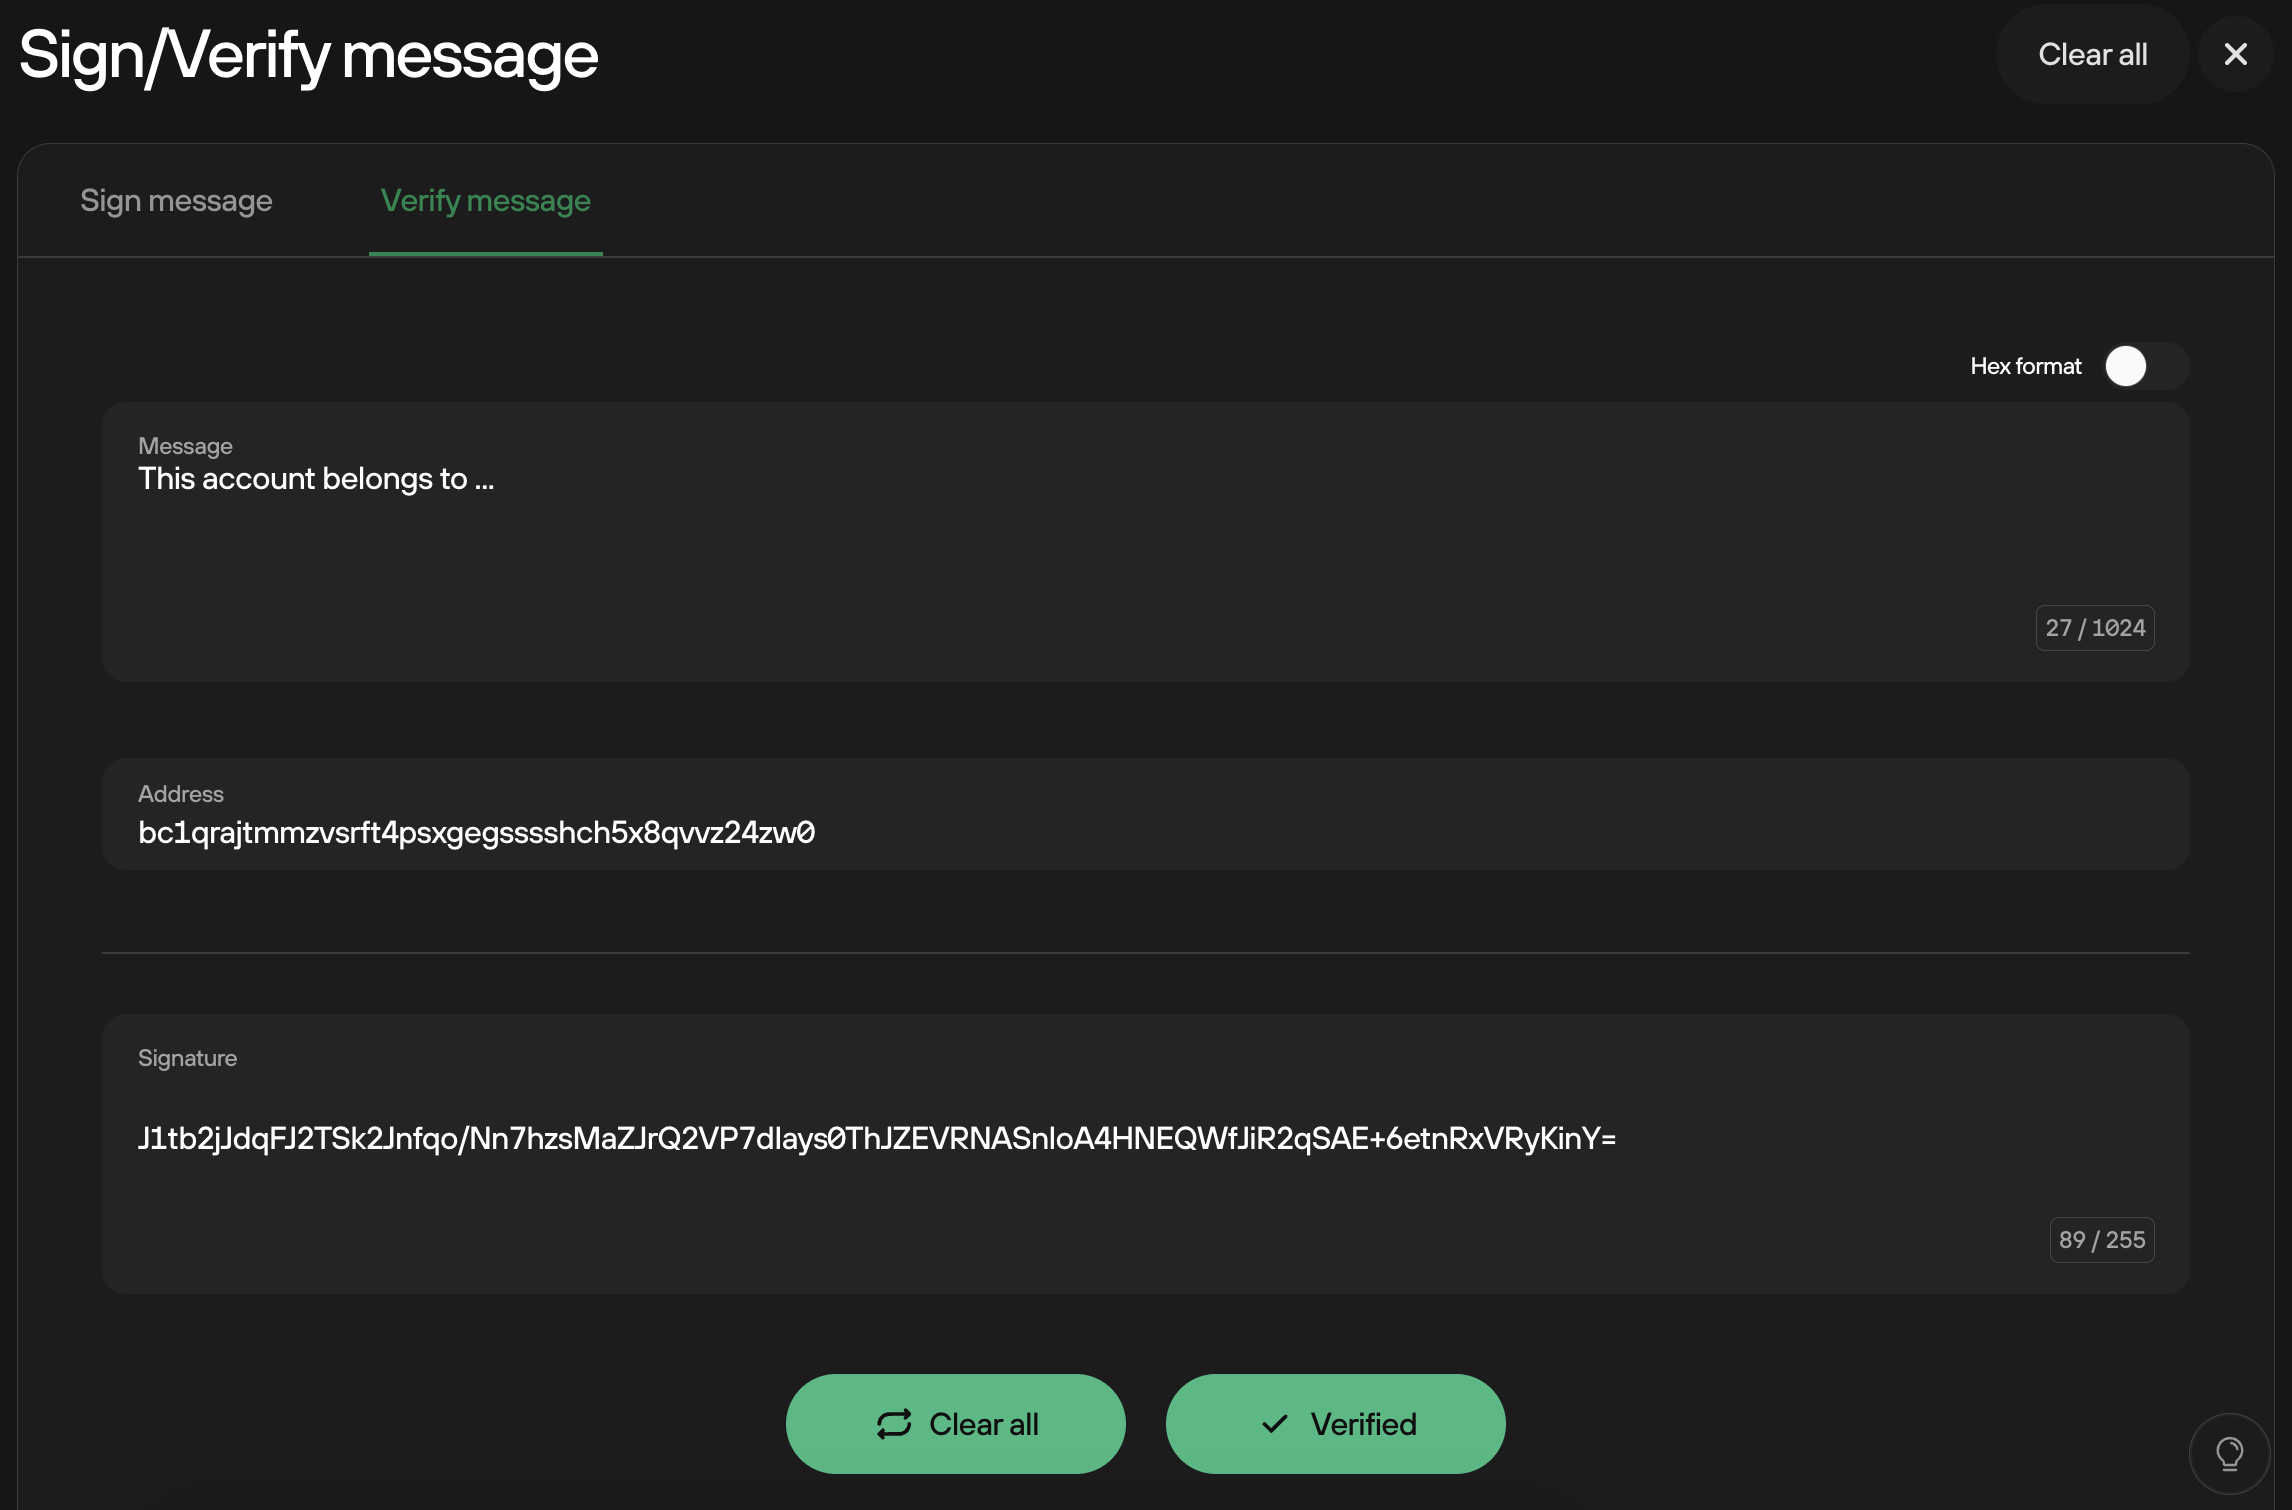
Verifying messages
To Verify a message, select the account you wish to verify with in Trezor Suite and click the three dots and select Sign & Verify.
1. Entering a message and an address
Copy and paste the signed message into the Message box. Paste the address used for signing the message in the Address box. Finally, paste the signature into the Signature box. Click on Verify.
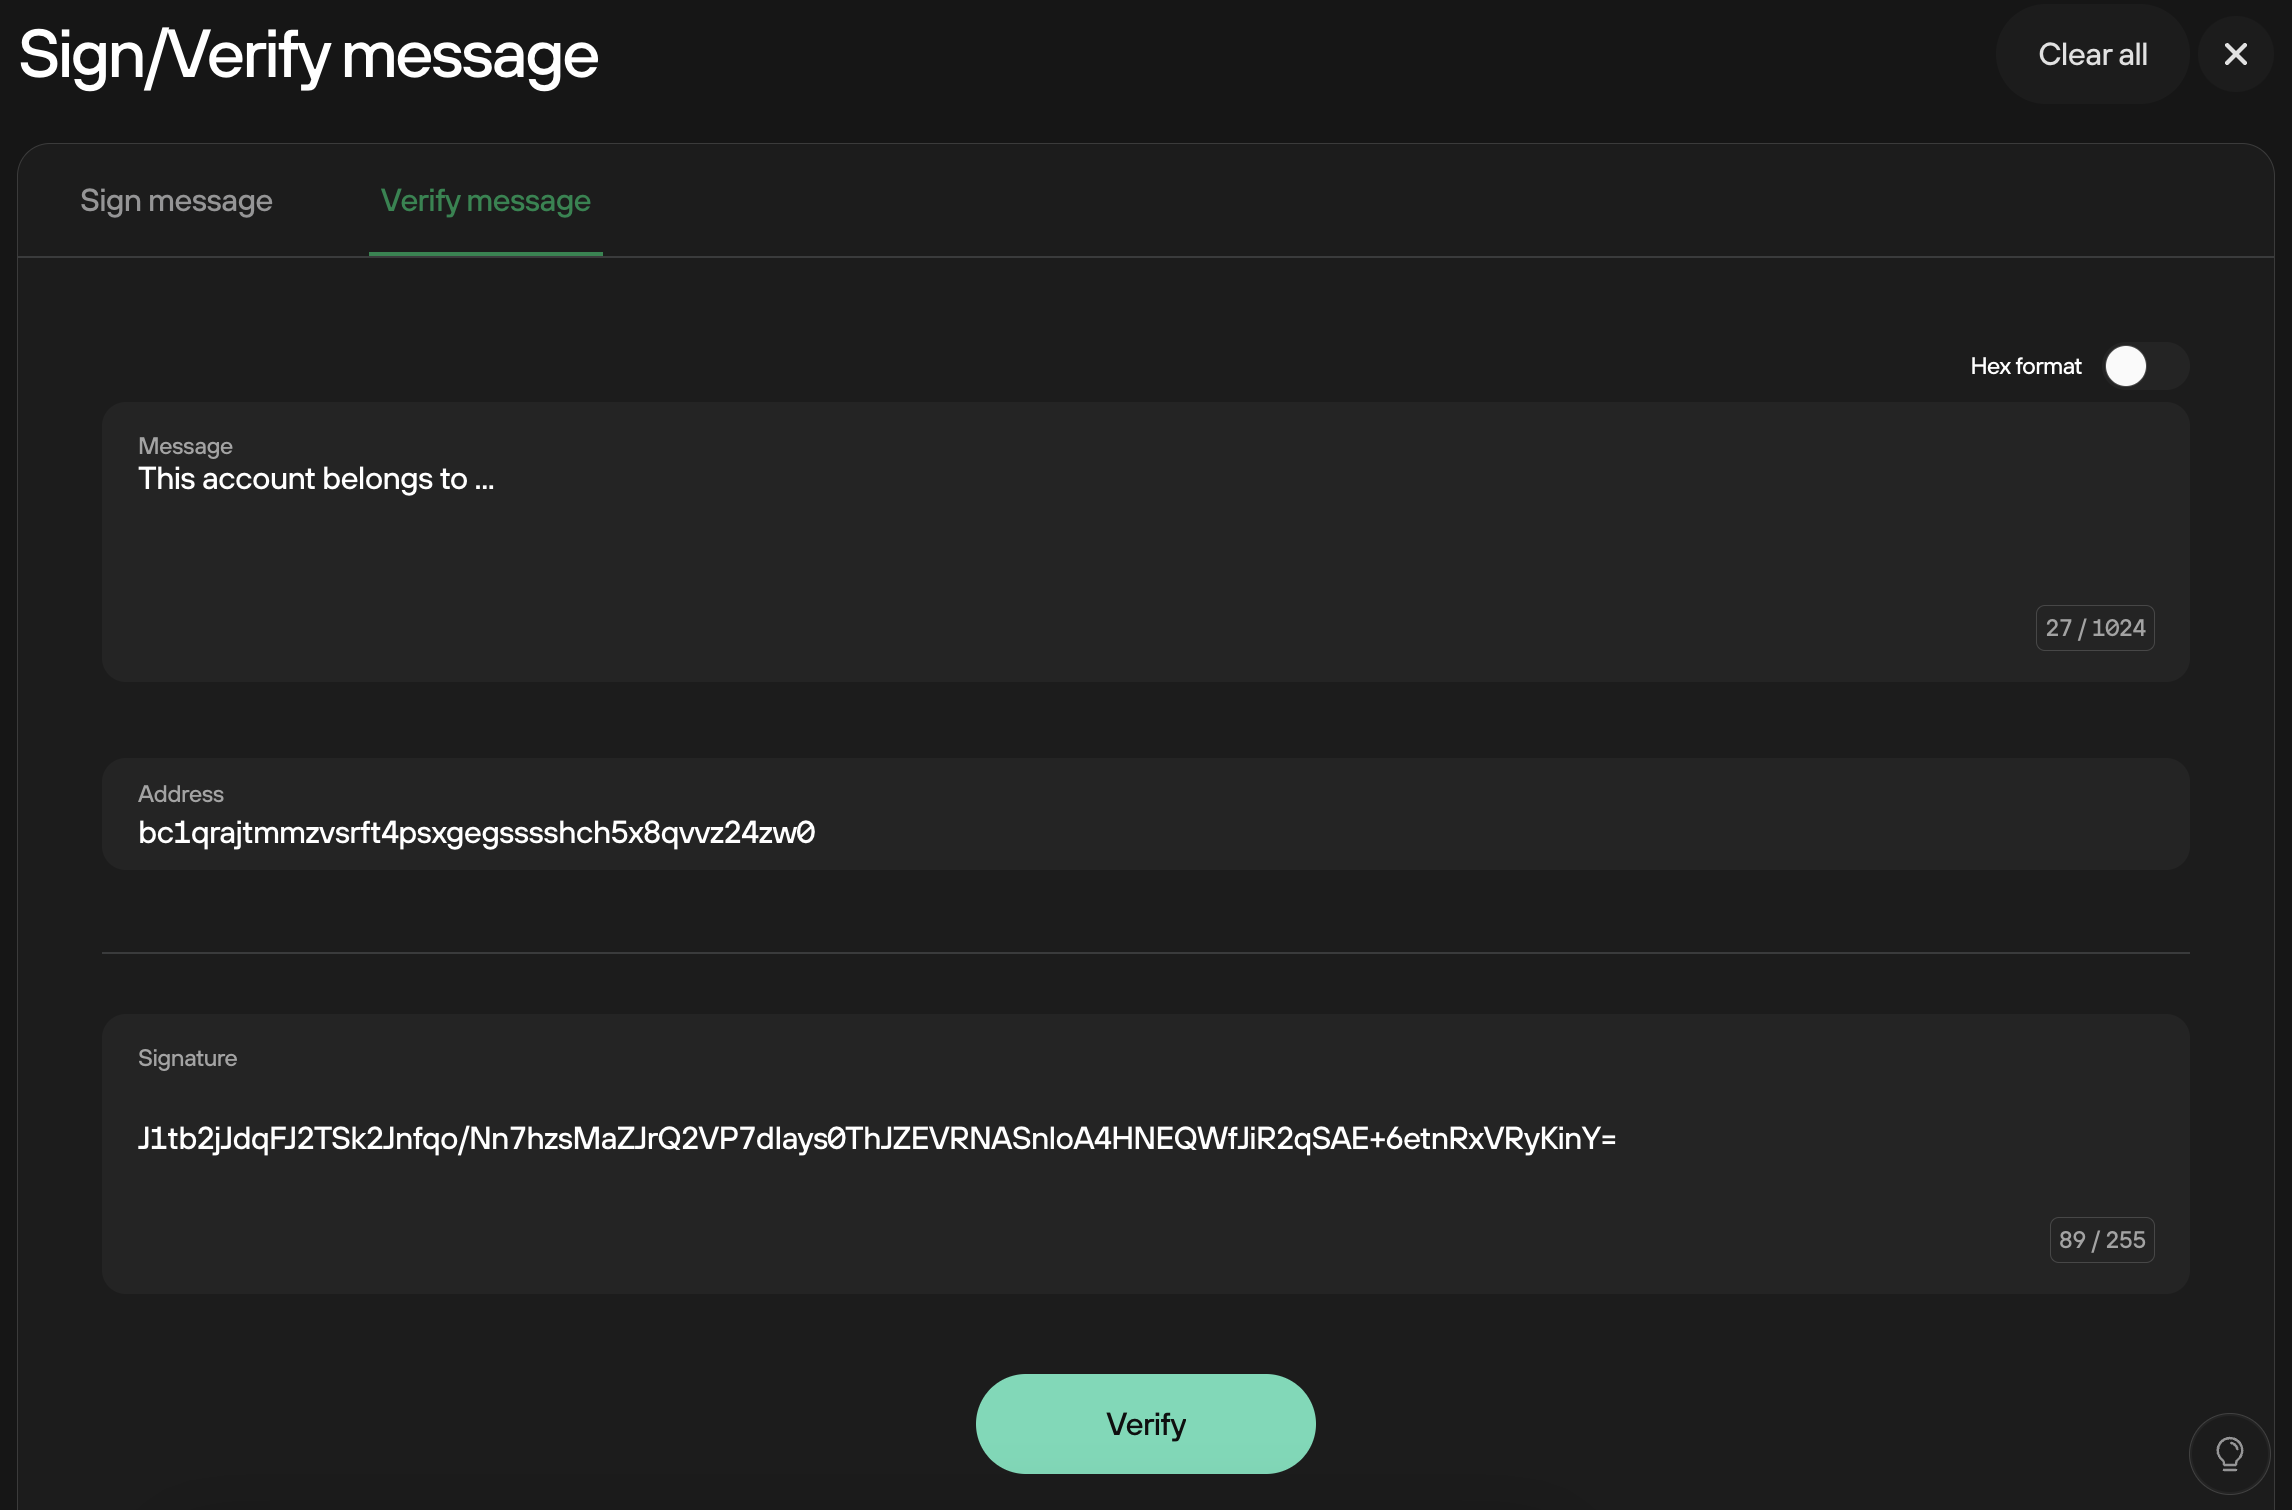
2. Validating on Trezor
Trezor should show the beginning of the message on its display if verified correctly. Otherwise, you will get an error message in Trezor Suite.
Once you have confirmed the verification on your Trezor, "Message verified" will appear on your computer screen.