SSH with Trezor
SSH, also known as Secure Socket Shell, is a network protocol that provides administrators with a secure way to access a remote computer. SSH also refers to the suite of utilities that implement the protocol. Secure Shell provides strong authentication and secure encrypted data communications between two computers connecting over an insecure network. SSH is widely used by network administrators for managing systems and applications remotely, allowing them to log in to another computer over a network, execute commands and move files from one computer to another.
What is OpenSSH?
OpenSSH is the premier connectivity tool for remote login with the SSH protocol. It encrypts all traffic to eliminate eavesdropping, connection hijacking, and other attacks. In addition, OpenSSH provides an extensive suite of secure tunneling capabilities, several authentication methods, and sophisticated configuration options.
Using Trezor SSH Agent, administrators can now enjoy password-less and secure authentication to their servers.
Thanks to the great job by Roman Zeyde, Trezor firmware (version 1.3.4 and higher) supports NIST256P1, which is an elliptic curve standardized by National Institute of Standards and Technology (NIST).
This addition does not affect your cryptocurrency funds at all, but it means you can now use Trezor for SSH login to any of your servers which support it (OpenSSH 5.7 or newer is needed).
SSH with Trezor
OpenSSH with Trezor via FIDO2
You need to have libfido2 (version 1.3.0 or above) and OpenSSH (version 8.2 or above) installed on your client.
OpenSSH needs to be compiled with the following option enabled.
--with-security-key-builtin
For the server, you just need to have OpenSSH (version 8.2 or above) installed.
It might take some time until these versions are packaged in your Linux distribution, but this will happen eventually. Some distributions such as Fedora, NixOS, and Debian have this functionality already in their pipeline.
Once you have everything set up properly you can issue the following command to generate a key pair backed by your hardware token (“ecdsa” stands for “elliptic curve digital signature algorithm” and “sk” stands for “security key”):
ssh-keygen -t ecdsa-sk
If you are using Trezor Model T, you should see a screen like this:
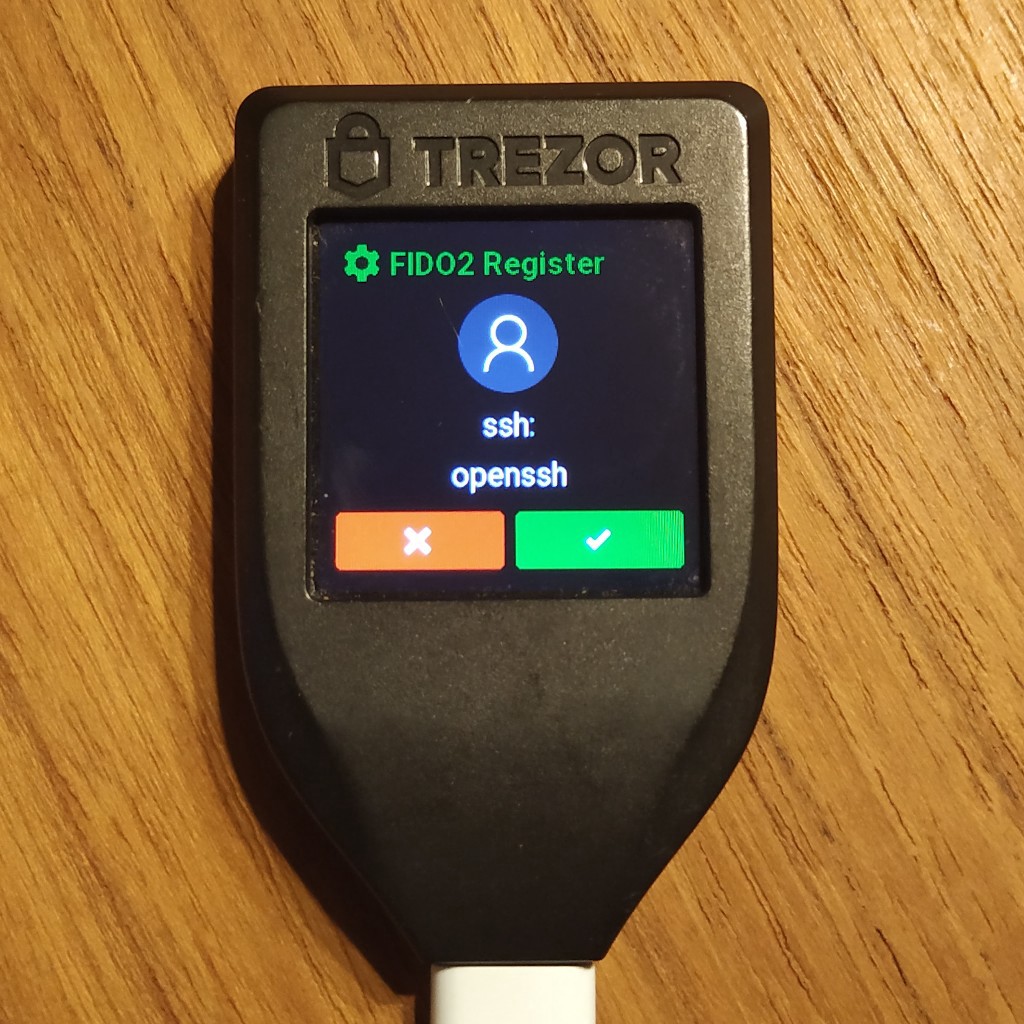
As you can see from the photo, FIDO2 relying party ID is set to ssh: and FIDO2 user ID is set to
openssh.
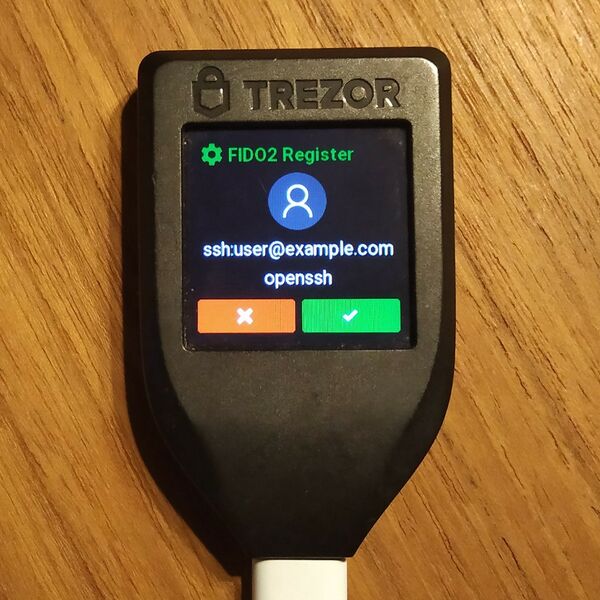
In case you want to use a different key for every server, you can modify the FIDO2 relying party ID via the -O application flag:
ssh-keygen -t ecdsa-sk -O application=ssh:[email protected]
Once you confirm this screen, two files will be created:
~/.ssh/id_ecdsa_sk
and
~/.ssh/id_ecdsa_sk.pub.
The contents of the .pub file can be added to the following on the server just like you are used to.
~/.ssh/authorized_keys
Once you do this, the OpenSSH will take care of the rest and next time you’ll try to login to that server, you’ll be prompted with the FIDO2 dialog on your device.
While following the instructions above, you might have noticed the following file was generated in the process.
~/.ssh/id_ecdsa_sk
This file does not contain a private key (like it usually does for other key methods), but it contains a FIDO2 credential required to reconstruct the private key inside of the hardware token. You need to keep this file on your client if you want to be able to log in from this machine.
Setting up Trezor SSH Agent on Linux
This manual has been tested with both Trezor One and Trezor Model T on Ubuntu 18.04 LTS and NixOS.
Setup (General Linux)
1. Install prerequisites:
2. Install trezor_agent through pip:
3. Udev rules need to be set up on your system; this can be done in two ways:
or
4. If your local bin folder ~/.local/bin has just been created, run the following command or log out and log back into system:
5. Generate public key using trezor-agent (enter your PIN and/or passphrase just like you would in Trezor Wallet).
6. Log into your server as usual and copy the row containing the ecdsa magic from the previous step into ~/.ssh/authorized_keys file on your server
7. From now on, you can log in to your server using trezor using the following command:
Setup (NixOS)
1. You will need to add following packages to /etc/nixos/configuration.nix:
2. Udev rules need to be set up on your system; this can be done in two ways:
services.trezord.enable = true;
or
3. You need to rebuild your system for the changes to take place:
4. Generate public key using trezor-agent (enter your PIN and/or passphrase just like you would in Trezor Wallet).
5. Log into your server as usual and copy the row containing the ecdsa magic from the previous step into ~/.ssh/authorized_keys file on your server
6. From now on, you can log in to your server using trezor using the following command: